Step-by-Step Guide to Lacto-Fermenting Snappy Green Beans
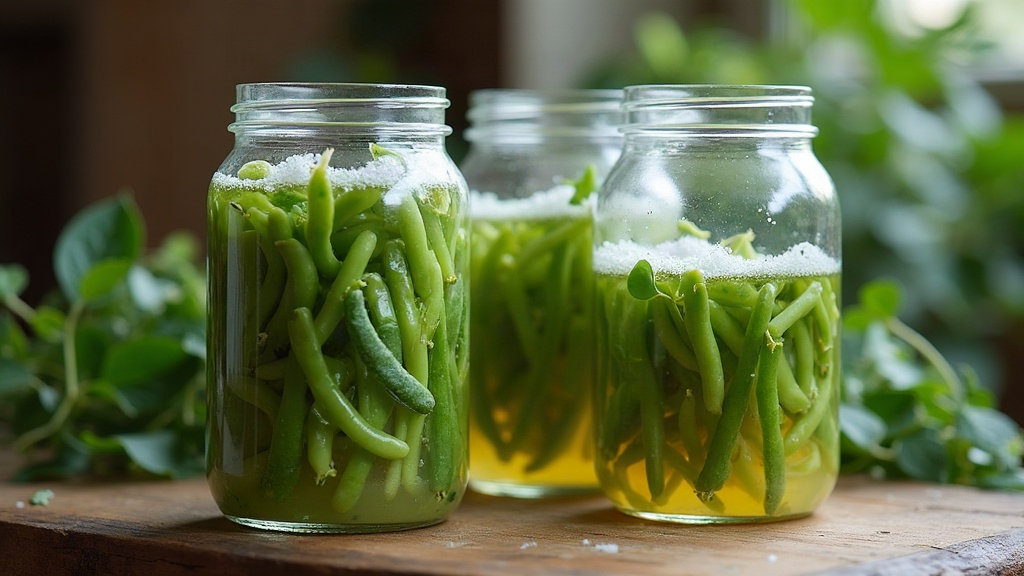
Lacto-fermenting green beans in a salt brine might be the simplest way to turn a garden surplus (or that overflowing bag from the farmers market) into tangy, probiotic-rich snacks that actually stay crunchy. This guide walks through the whole process, from picking the right beans to fixing a batch that’s gone soft or slimy, so you can ferment with confidence even if you’ve never touched a fermentation jar before.
Why Lacto-Ferment Green Beans?
Unlike vinegar pickling, lacto-fermentation depends on naturally occurring lactic acid bacteria (mostly Lactobacillus species) converting sugars into lactic acid. This does a few things at once:
- Preserves beans without canning or heat processing
- Builds a sour, layered flavor vinegar simply can’t fake
- Delivers probiotics and enzymes along with the flavor
- Needs nothing but salt, water, and patience
The real challenge with green beans, specifically, is texture. Nobody wants a jar of mushy dilly beans sitting in the fridge. Everything below is built around keeping that signature snap intact.
What You’ll Need
- Fresh, firm green beans (1–1.5 lbs per quart jar): the fresher they are, the crunchier they’ll end up
- Filtered or dechlorinated water: chlorine can slow or stall fermentation entirely
- Non-iodized salt: sea salt or pickling salt (iodized salt discolors beans and drags fermentation down)
- A fermentation vessel: a wide-mouth quart jar, a crock, or a fermentation jar with an airlock
- A fermentation weight: something to hold the beans under the brine
- Flavorings (optional): garlic cloves, dill heads, mustard seeds, red pepper flakes, black peppercorns
- A tannin source: grape leaf, oak leaf, or even a pinch of black tea leaves helps beans stay crisp
Step-by-Step Process
1. Choose and Prep the Beans
Grab a bean and bend it. If it snaps clean, that’s your green light. That audible snap tells you more about eventual crunch than anything else you can check before fermenting even starts. Wash the beans well and trim off the stem ends. You can leave them whole or cut them to jar size, but whole beans generally hold their crunch longer.
2. Make Your Brine
For green beans, aim for a salinity of 3–5%:
- 1 tablespoon (about 17g) non-iodized salt per 2 cups (500ml) water gets you to roughly 3.4%
Stir the salt into room-temperature filtered water until it’s completely dissolved. Some people push the brine up to 5% for beans in particular, since a bit of extra salt helps them stay firm through the ferment.
3. Pack the Jar
Drop your flavorings in first, garlic, dill, mustard seeds, a tannin leaf, right at the bottom of the jar. Then pack the beans in tight, standing upright if you can manage it, leaving about 1–1.5 inches of headspace at the top.
4. Add Brine and Weigh Down
Pour brine over the beans until they’re completely covered, then set a fermentation weight on top so nothing floats back up. Any bean that pokes above the brine line is basically an invitation for mold.
5. Seal and Ferment
An airlock lid works great, but a regular lid burped once a day (or a dedicated fermentation lid) does the job too. Keep the jar at room temperature, somewhere between 65–75°F is the sweet spot, out of direct sun.
6. Monitor Daily
- Days 1–3: The brine will likely turn cloudy. That’s fermentation kicking in, not a warning sign.
- Days 4–7: Start tasting around day 4. You’re looking for a pleasant, growing sourness.
- Days 7–14: Most kitchens hit full fermentation somewhere in this window; a cooler room just means more patience.
Taste every couple of days and stop when the flavor and crunch feel right to you, then move the jar to the fridge.
7. Store
Once you’re happy with the taste, transfer the jar to cold storage. The fridge slows fermentation way down, and the beans will keep for several months, quietly deepening in flavor the whole time.
Troubleshooting Common Problems
Soft or mushy beans Nine times out of ten, this comes down to beans that weren’t fresh to begin with, a ferment left too long at warm temperatures, or a blossom end that never got trimmed (it holds enzymes that break down texture fast). Trim both ends, every time, no exceptions.
Kahm yeast (white film) Not dangerous, but it can nudge the flavor in an off direction if you let it sit. Skim it off the top and double-check that your beans are still fully submerged.
Mold (fuzzy, colored) Toss the whole batch. Mold shows up when beans get exposed to air, so better weighting and tighter headspace management is the fix going forward.
Cloudy brine Totally normal, and honestly a good sign. It means the bacteria are doing their job, not that anything’s gone wrong.
Final Tips for Maximum Crunch
- Use the freshest beans you can get your hands on; same-day harvest is the gold standard
- Toss in a tannin-rich leaf every single batch
- Lean toward the cooler end of the temperature range when you can
- Never skip the weight. Full submersion isn’t optional, it’s the whole game.
Conclusion
Lacto-fermenting green beans in salt brine doesn’t ask for much equipment, just patience and a little attention. Get the fundamentals right (fresh beans, accurate salinity, full submersion, cool fermentation temps) and you’ll turn out jar after jar of tangy, snappy, probiotic-loaded beans worth making on repeat.